
Open the wallboard list
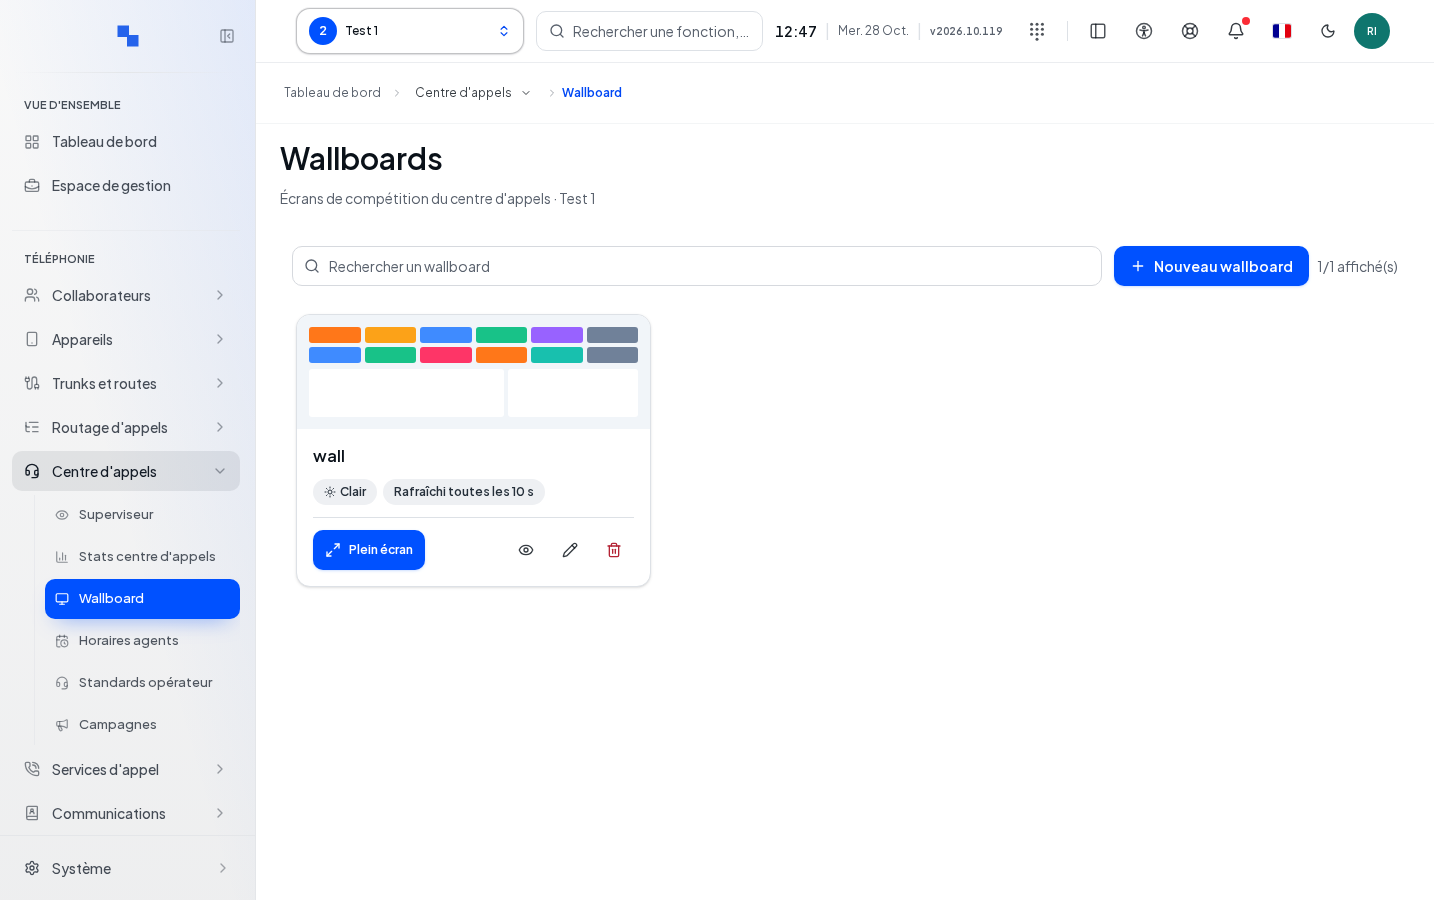
A wallboard displays live queue activity on a supervision screen or a television. Select the client, then open Call Center › Wallboard; the same page is also accessible via Analytics & Reports. Read permission allows viewing wallboards; write permission allows creating, editing, and saving their objectives.
Each wallboard appears as a card: thumbnail, name, description, theme (Light or Dark), and refresh rate, for example Refreshed every 10 s. Search wallboard filters by name and description, ignoring accents and case. The counter shows the number of displayed wallboards out of the total.
| Command | Effect |
|---|---|
| Full screen or click on the thumbnail | Opens the wallboard display, described in Supervision Dashboard — TV Display |
| Preview / Hide preview | Shows a live preview of the wallboard below the list, without leaving the page |
| Edit | Opens the wallboard in edit mode; requires write permission |
| Delete | Opens the deletion confirmation |
| Display link | Creates or revokes login-free access; requires sharing permission |
Create a wallboard
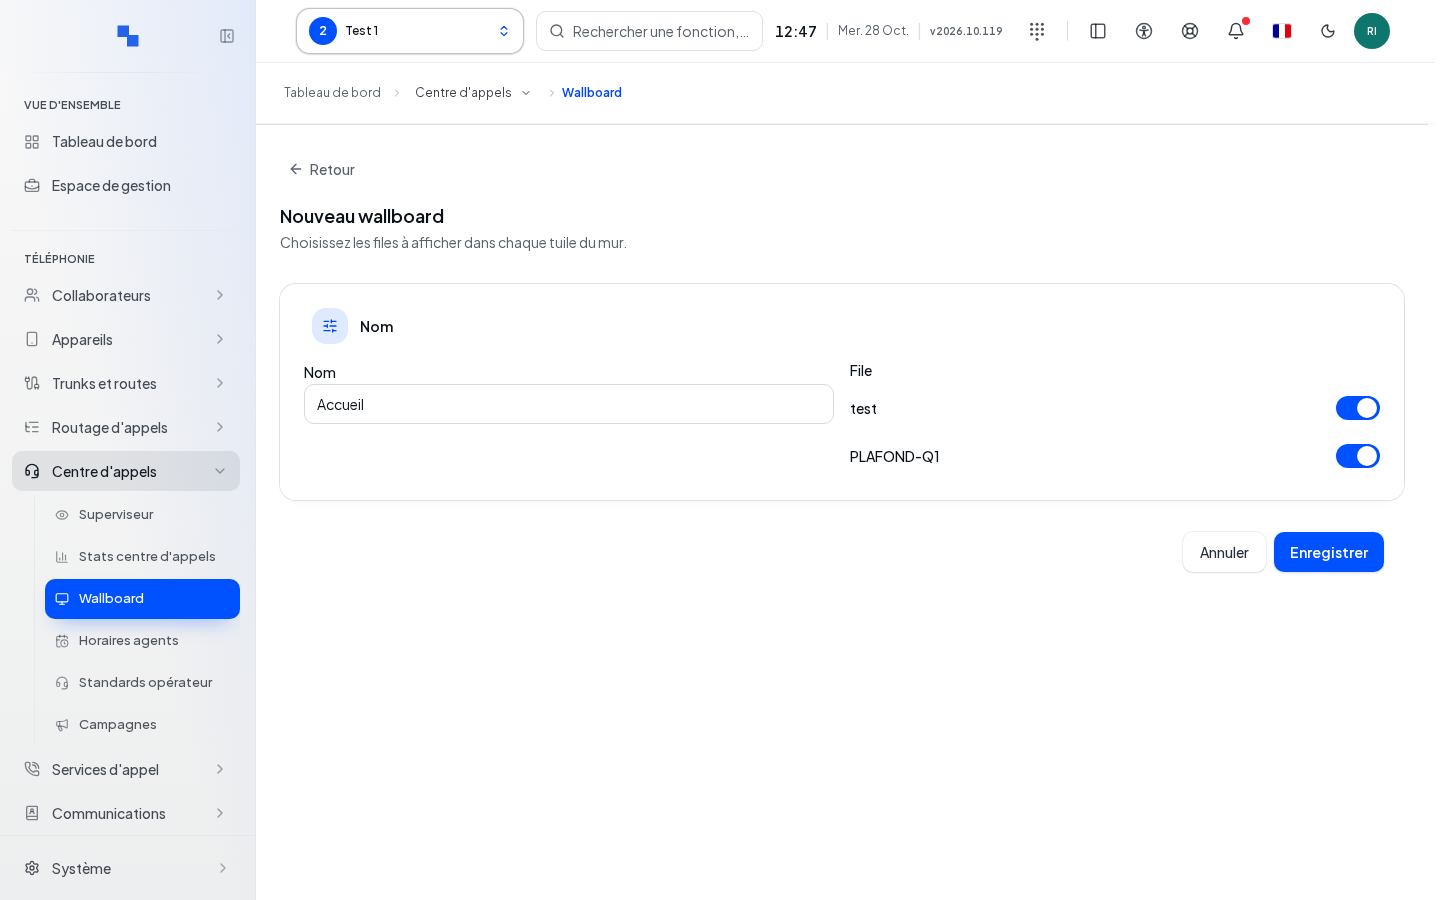
- Click New wallboard.
- Enter the Name.
- Enable the queues to display in the Queue list.
- Click Save; Cancel or Back exits the form without creating anything.
| Field | Purpose | Possible values | Example |
|---|---|---|---|
| Name | Identify the wallboard; required | Non-empty text | Reception |
| Queue | Choose the queues tracked by the wallboard | Client queues, one or more | Reception Queue |
The wallboard is created with a light theme and a 10-second refresh rate. It immediately opens in edit mode to arrange its screens. An empty name is rejected with "Name is required." If the queue list cannot be read, "The target list could not be read: enter the ID." is displayed instead of the queues.
Organize screens
A wallboard can contain up to eight screens, displayed as tabs at the top of the display. A new wallboard provides three screens:
| Screen | Content |
|---|---|
| Overview | Tiles with key figures, table of waiting calls by queue, Recent calls, and Agent status |
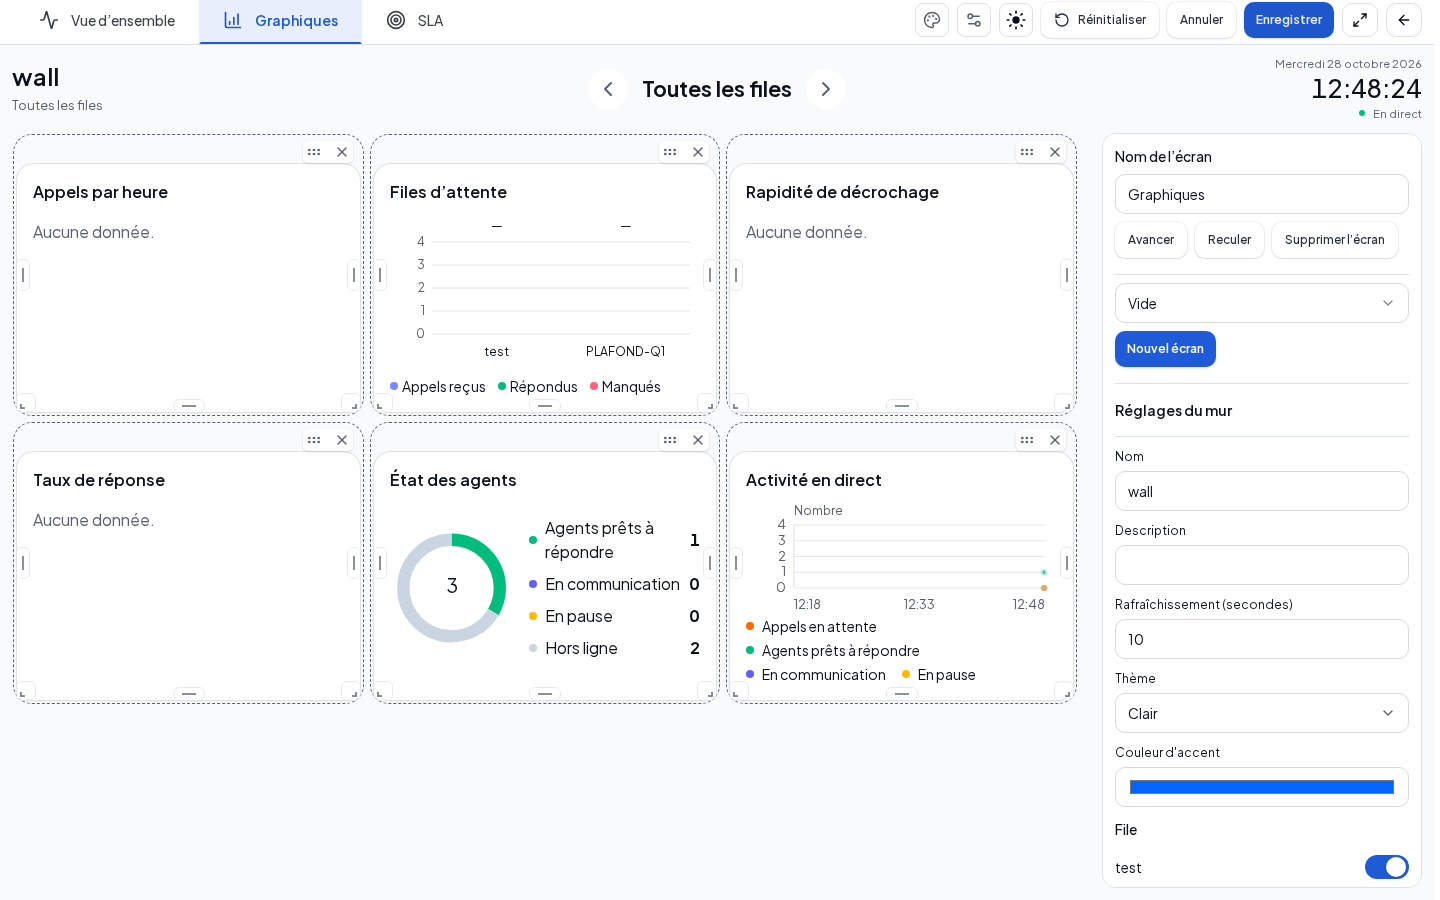
| Charts | Calls per hour, Queues, Answer speed, Answer rate, Agent status, and Live activity |
| SLA | Today's service level compared to objectives, broken down by queue, and its hourly evolution |
On a computer, with write permission, manage tabs directly in their bar:
- Click + (New screen) after the tabs.
- Choose Empty, Stats only, Charts, SLA, or Copy of current screen. The new screen is selected; the limit is eight screens.
- To remove a screen, click its cross icon. In Delete screen, check the name then confirm with Delete screen, or choose Cancel to keep it. The last screen is protected: it cannot be deleted, even an SLA screen.
- Click Save to keep the wallboard changes. Cancel in the wallboard bar restores the last saved layout, even after a deletion confirmed in the dialog.
These actions open the wallboard's edit draft. Controls are absent in read-only mode and on the public link. To rename or reorder a screen, use Edit wallboard, or Edit from the list: in the right panel, change the Screen name (up to 40 characters, non-empty), then Move forward or Move back to reposition the tab. Add and delete controls in the panel follow the same rules. Copying or deleting a screen preserves the wallboard's SLA settings.
Place elements
In edit mode, each screen element has a move handle, a delete control, and a resize handle on its corners and edges. The grid has twelve columns.
- Click Add element in the right panel.
- Choose an element from Tiles, Charts, or Lists, or drag it to the desired location on the grid.
- Move an element by its handle; resize it from an edge or corner.
- Remove: {element} removes it from the screen; the actual name replaces
{element}. - On a tile, Color selects its hue: Automatic, a suggested color (Blue, Teal, Purple, Orange, Emerald, Red, Amber, Pink, Slate), or a custom color set with sliders.
| Family | Available elements |
|---|---|
| Tiles | Waiting calls, Longest wait, Connected agents, Agents ready to answer, On call, On break, Calls received, Answered, Missed, Overflowed, Answer rate, Answer speed, Active calls, Average duration |
| Charts | Live activity, Calls per hour, Answer rate, Agent status, Today's results, Queues, Answer speed, Today's agent ranking |
| Lists | Call list, Recent calls, Agents, Today's agent ranking |
Click Save to keep the layout, or Cancel to return to the last saved layout. Reset restores the entire wallboard to its original layout, with the three screens offered at creation; this reset is only kept after Save. Leaving the page with unsaved changes prompts a browser confirmation.
The layout is saved on the phone server and applies to all screens displaying this wallboard. "Layout saved." confirms the save.
If the phone server does not yet have the version that supports saving the layout, it is kept on this screen only: "Layout saved on this screen. It will be saved to the PBX after its update." The wallboard's other settings are still saved. Have the server updated before preparing multiple identical screens.
"This layout cannot be saved. Adjust the elements and try again." indicates an element outside the grid or an invalid screen. "The layout could not be saved. Try again." indicates a communication failure; your changes remain displayed.
The Average duration tile measures queue call conversation answered on the agent's segment, among completed calls. It excludes the voice server and conversation after transfer; it shows "—" with no measurement. The ranking and queue statistics use this same measure for their scope. With multiple queues, only measured conversations weight the average. See reading indicators.
Configure the wallboard
Below screen management, Wallboard settings groups the parameters common to all screens. They are saved with Save, like the layout.
| Field | Purpose | Possible values | Example |
|---|---|---|---|
| Name | Title displayed at the top of the wallboard; required | Non-empty text | Reception |
| Description | Clarification displayed after the queue name | Optional text | Morning team |
| Refresh (seconds) | Rate at which counters are read | Integer from 1 to 300; 10 by default | 10 |
| Theme | Wallboard background | Light or Dark | Light |
| Accent color | Color of tabs and markers | Color picker | Blue |
| Queue | Queues tracked by the wallboard | Toggle per queue | Reception Queue enabled |
An empty name or a refresh rate outside 1 to 300 seconds prevents saving. The Wallboard tiles panel keeps the wallboard's legacy tiles: Type (Queue, Agent, or Entire client), Target, Label (optional), and Counters; Add tile creates one, Remove removes it. No selected counter means all counters.
Set service level objectives
Service level (SLA) measures the proportion of calls answered within a given time. The SLA screen compares today's figures to objectives and colors each tile: Met in green, Close in orange, Not met in red, Unknown in gray.
Displayed formula: Service level = (Answered ≤ T) / (Calls received − Abandoned < S) × 100, where T is the answer threshold and S the duration of a short abandonment. A call abandoned before S seconds is not counted.
- Open the SLA screen outside edit mode.
- Click Configure SLAs for the common objectives, or click a queue name or a displayed objective for that queue only.
- In the Configure SLAs dialog, first set the target percentage and the delay in seconds. The help text explains the principle; units are indicated. Choose a preset (80/20, 90/30, or 70/30) or enter each value. The button opens existing objectives without resetting them.
- Click Save; Cancel closes the form.
- For a custom queue, Inherited removes its own objectives and restores the default values.
| Field | Purpose | Possible values | Initial value |
|---|---|---|---|
| Service level | Minimum proportion of calls answered within the threshold | 0 to 100% | 80 |
| Threshold (s) | Answer delay T | 1 to 3600 seconds | 20 |
| Short abandonments (s) | Duration S below which an abandonment is ignored | 0 to 60 seconds | 5 |
| Answer speed (s) | Maximum average wait before answering | 1 to 3600 seconds | 30 |
| Abandoned | Maximum proportion of abandoned calls | 0 to 100% | 5 |
| Answer rate | Minimum proportion of calls answered | 0 to 100% | 95 |
| Longest wait (s) | Alert threshold for current wait | 1 to 3600 seconds | 60 |
| Critical (s) | Critical threshold; higher than the previous one | 1 to 7200 seconds | 120 |
| Overflowed / Exhausted | Maximum proportion of overflows to another queue; another exit without an answer does not count | 0 to 100% | 2 |
| Alert margin (%) | Tolerated deviation before switching from Close to Not met | 0 to 100% | 10 |
A value outside the limits, or a critical threshold less than or equal to the alert threshold, displays "Invalid value" and blocks saving. In the queue table, Custom or Inherited indicates the origin of the objectives; queues missing the most objectives are placed at the top. While entering values, tab switching and auto-scrolling are suspended.
A value of "—" accompanied by Unknown means today's data collection is incomplete or too old. This is never a zero: do not draw conclusions from it. If the phone server does not yet provide these counters, the screen displays "Available with the next PBX version."
Delete a wallboard
Delete opens Delete wallboard. Confirm with Delete to permanently remove the wallboard, or click Cancel to keep it. A screen that was displaying this wallboard will then indicate it is no longer accessible.
Verify the result
Open the wallboard in Full screen. Check the name, the tabs, the Live indicator in the top right, and the queues offered via the arrows. Compare a simple figure, such as waiting calls, with the actual situation.
If it doesn't work
If the list fails to load, its error message replaces the list; an empty list, on the other hand, means no wallboard exists. If the search finds nothing, clear the filter. If Edit is grayed out, request write permission on wallboards. The wallboard does not replace the agent management controls of the Supervisor.
Share a wallboard without login
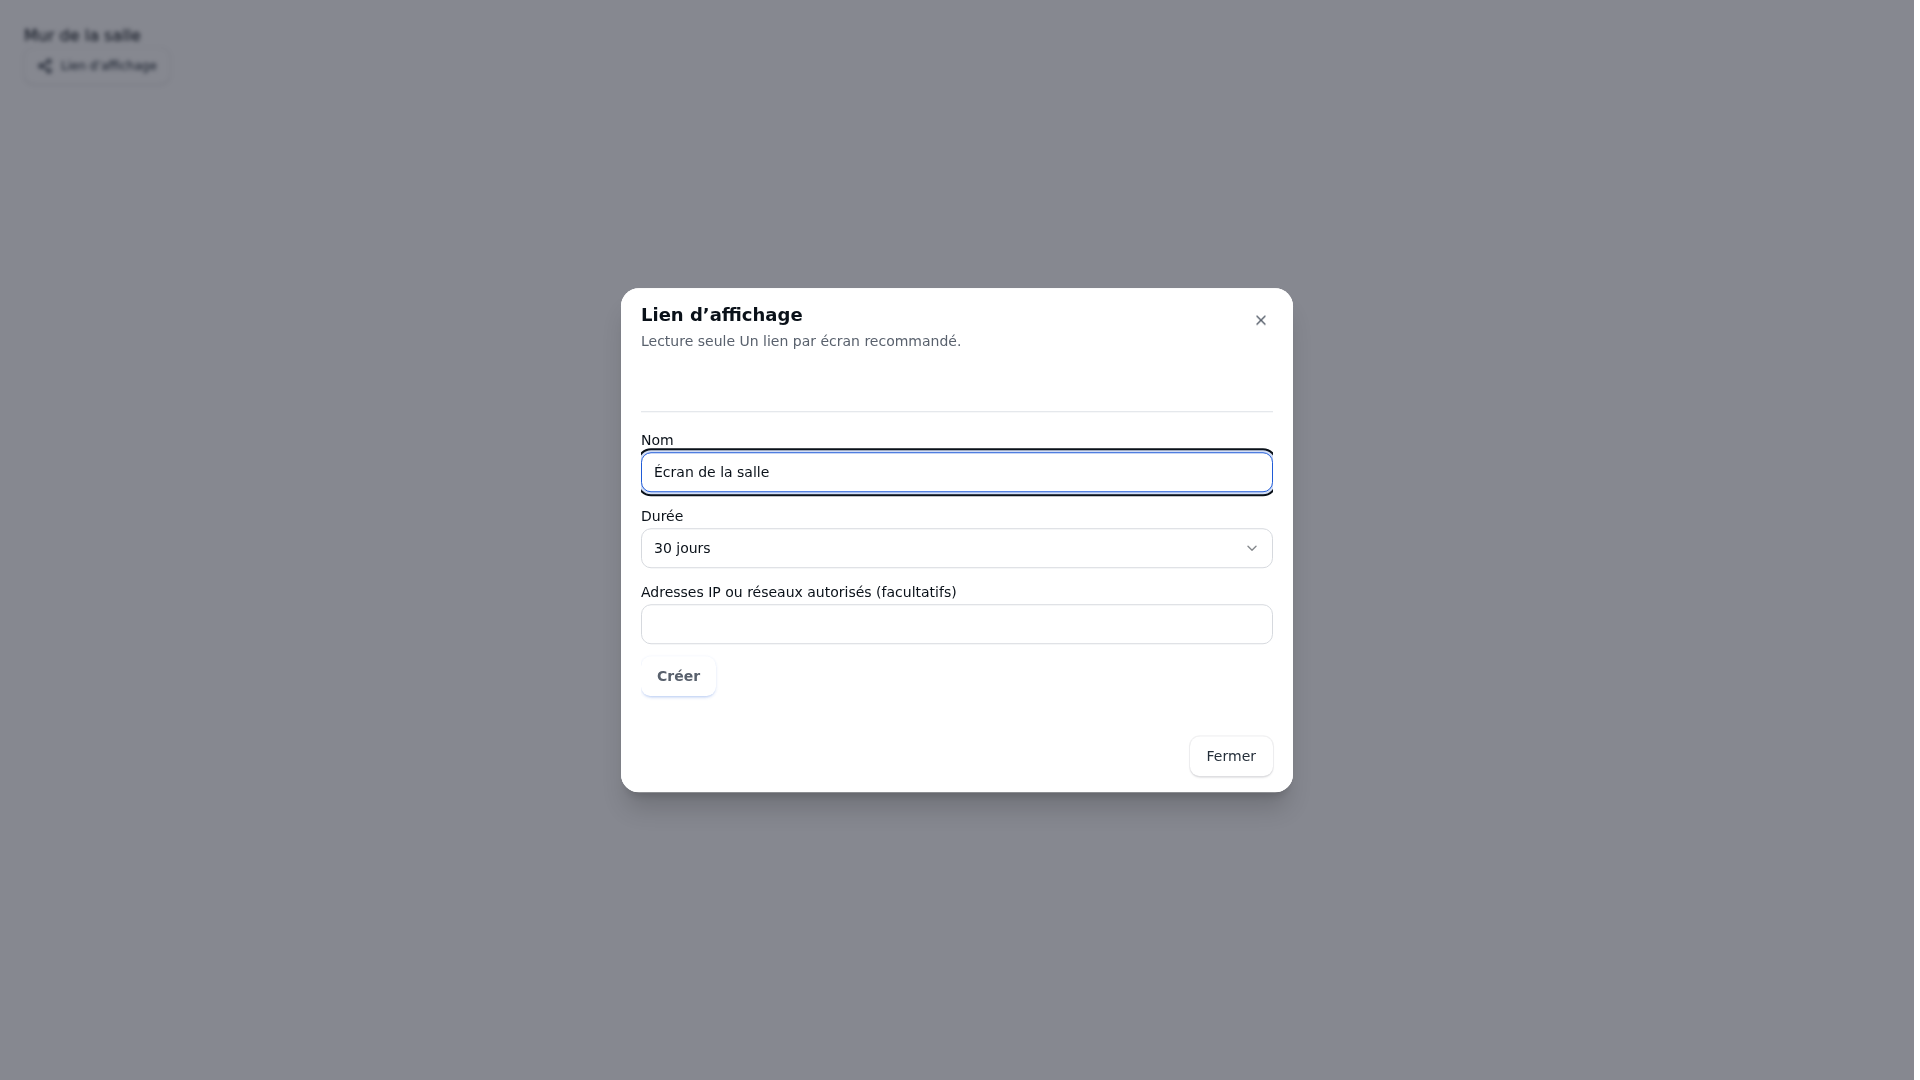
The permission to share supervision dashboards is separate from the edit permission. From the wallboard card, open Display link, identified by a chain link icon. Create a separate link for each physical screen: you'll be able to revoke one access without interrupting the other televisions. The link applies to the wallboard and its queues, not just the tab displayed at the time of its creation.
| Field | Purpose | Possible values | Example |
|---|---|---|---|
| Name | Identify the destination screen; required | Non-empty text, up to 120 characters | Room screen |
| Allowed IP addresses or networks (optional) | Restrict the networks allowed to read the link; optional | IPv4/IPv6 addresses or CIDR networks, separated by spaces or commas; up to 32; empty allows any address with the link | 192.0.2.10 |
New links are created without an expiration date: no Duration field needs to be filled in. The link remains active until revoked, as long as the wallboard exists and network restrictions are met.
- Enter the name and any necessary restrictions. For a screen behind a router, use the outbound address seen by the server.
- Click Create; the button is unavailable if the name is empty or during the operation.
- Immediately click Copy and save the full link on the destination screen. It is shown only once; Close dismisses the dialog.
- Open it in a browser without a session and check the data actually visible.
The list shows the name, status, last use, and the address used. No expiration row appears for a new link; a deadline may still appear for an older link created with an expiration date. To cut off access, click Revoke, check the name, then confirm with Revoke; Cancel keeps the access. Revocation is permanent. The open wallboard loses its data on the next check. To replace a lost link, create a new one and revoke the old one if necessary; this window does not allow editing an existing link.
Anyone with the link can read the authorized data, without an account, subject to network restrictions. Check the saved blocks and queues before distribution. Without a targeted queue, the wallboard covers all of the organization's queues. A link grants no edit rights or phone control.
Loading, creation, revocation, or copy errors remain displayed in the window. Read the message before retrying; a failed copy does not prove the link was not created. If the link is still visible, select it to copy it manually.
See Supervision Dashboard — Public Link for the displayed data and reading limitations.
Reading indicators
The wallboard's lists and its preview are more compact to display more rows. Hover over a truncated identity to read its tooltip; scroll the panel if all rows don't fit within its height.
An overflow corresponds to a departure to another queue; a missed call received no human answer, even after fallback. The connected wallboard's totals count each call only once. See definitions and the example of transfer between two queues before comparing counters.