
Open the client's API
This page is intended for the administrator who grants access to an application. Select the client, then open API. Wait for the permissions check. The available tabs depend on your authorizations: Tokens, Documentation, Webhooks. Without a client, the screen prompts "Choose a client.".
The old API and integrations entries lead to Tokens. The old developers page leads to Tokens, or to Webhooks when it requested that tab. The client's tokens follow their creator's permissions.
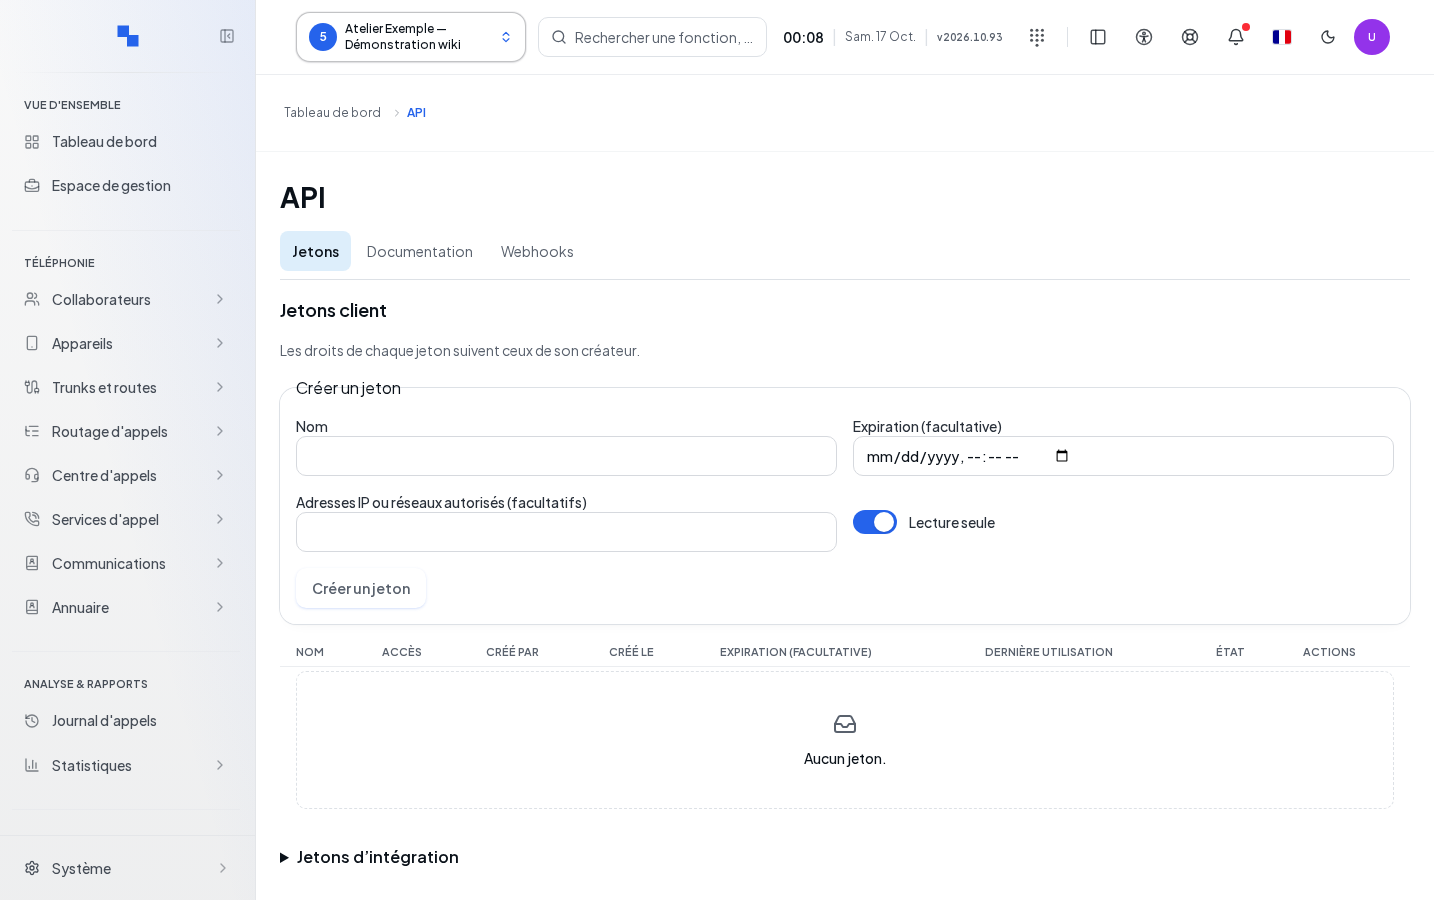
Create and keep a token
| Field | Purpose | Possible values | Example |
|---|---|---|---|
| Name | Identify the application; required | Text, 120 characters maximum | Daily export |
| Expiration (optional) | Limit the access duration | Date and time suggested by the field | Project end date |
| Allowed IP addresses or networks (optional) | Restrict the allowed origins | Addresses or networks, depending on server control | Your integration server's address |
| Access | Limit operations | Read only, selected by default, or Read and write | Read only |
- Fill in the form on the Tokens tab.
- Click Create a token. An empty name prevents creation.
- Click Copy, then store the key in your application's secrets manager.
- Click I have saved the key. The key will no longer be displayed after closing.
The list shows the creator, the creation date, the last use, and the current status: active, expired, or revoked. Renew the key provides a new secret to give to the application. Revoke opens a confirmation showing the token's name. Confirm to remove its access, or click Cancel. During an operation, wait for it to finish before starting again.
Under Integration tokens, a second form offers the integration's permissions and its request limit: required name of 120 characters maximum, at least one permission, limit of 1 to 600 requests per minute, initially 60. The call log read permission is selected by default. Also keep the secret displayed after creation or renewal.
Read the documentation and try a route
- Open Documentation.
- Use Search a route, then open the desired operation.
- Read Parameters, Request body, Responses, and the Schemas. A star indicates a required parameter.
- For a test, fill in Key to try and the required parameters. The Target client (identifier, optional) field is used when an explicit scope is needed.
- Click Try. An operation that may modify data requires confirmation; Cancel closes this confirmation.
- Read the displayed response. Download OpenAPI retrieves the API description.
The test key remains on this page and disappears when you leave it. The test actually contacts the PBX: check the values before confirming a write operation.
Verify the result and resolve a denial
Check that the token appears in the list, then that the application uses the new key. If loading fails, retry it with the displayed retry command. If you see an access denial, have your read, write, and secrets management permissions checked: read-only access to the page is not enough to create a token.
For notifications sent to another server, see Webhooks.