
The Devices fleet manages the customer's handsets, their assignments and their automatic configuration. Select the customer. Prepare the hardware address, the model and the users with internal number before adding a phone.
Browse and filter the fleet
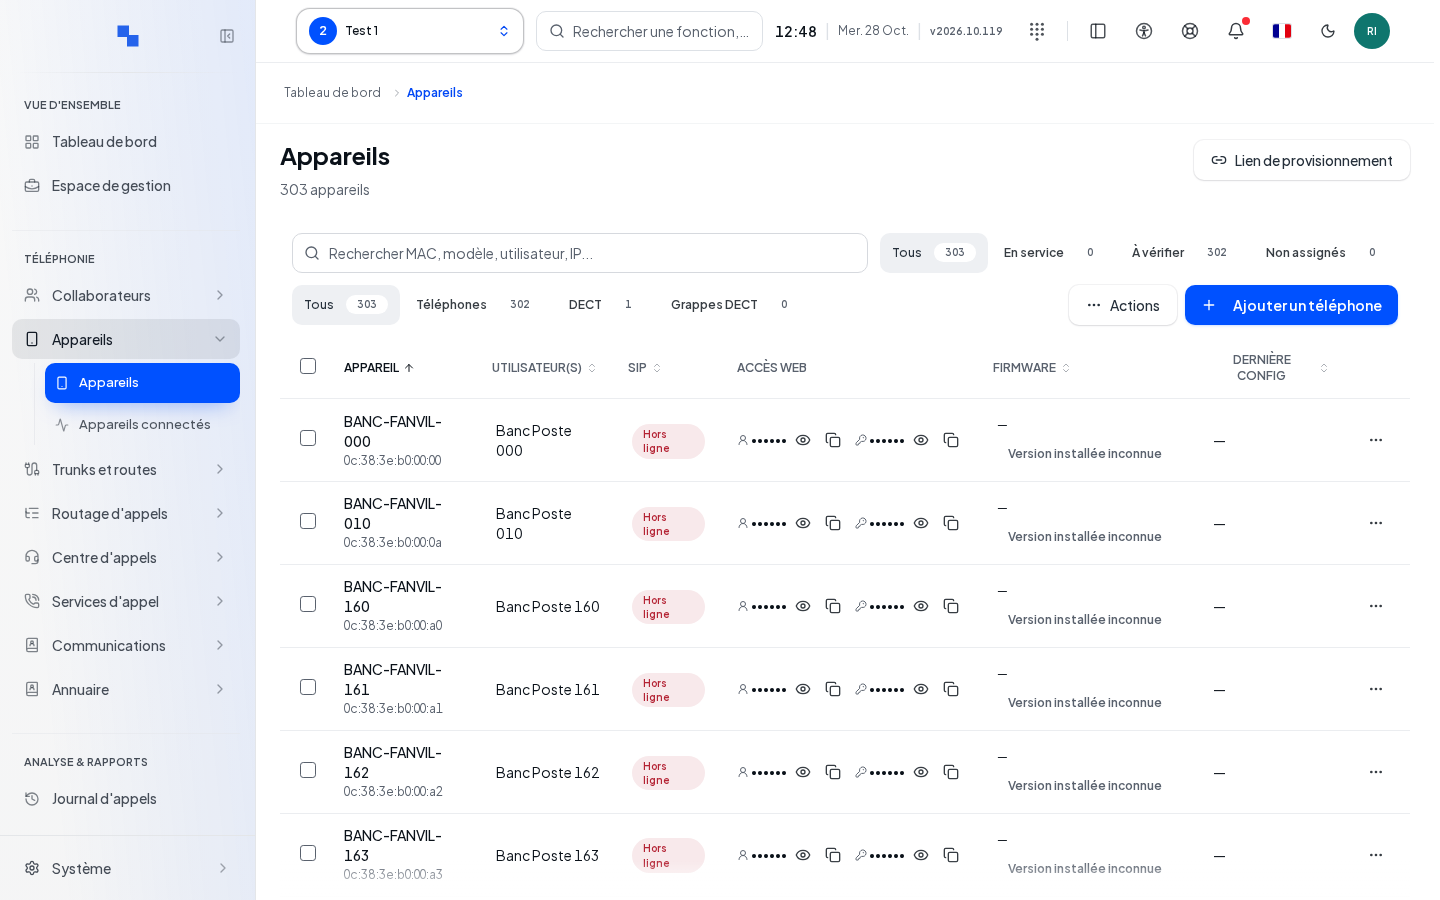
The search accepts MAC, model, user or IP address. The filters offer All, In service, To check, Unassigned and the device types. The In service and To check statuses can only be used if telephone registration has been measured.
The table shows device, users, SIP, radio base station, web access, firmware and last configuration. The Truncated list and Incomplete inventory warnings limit what you can conclude from a dash. Use pagination; Previous and Next are disabled at the ends.
Actions gives access to scheduling, the firmware catalog, the logo, the configuration URL and Export inventory (CSV). The checkboxes select the handsets on the page for bulk actions. The old Fleet and SIP accounts entries lead to the current fleet.
Add a phone or a generic device
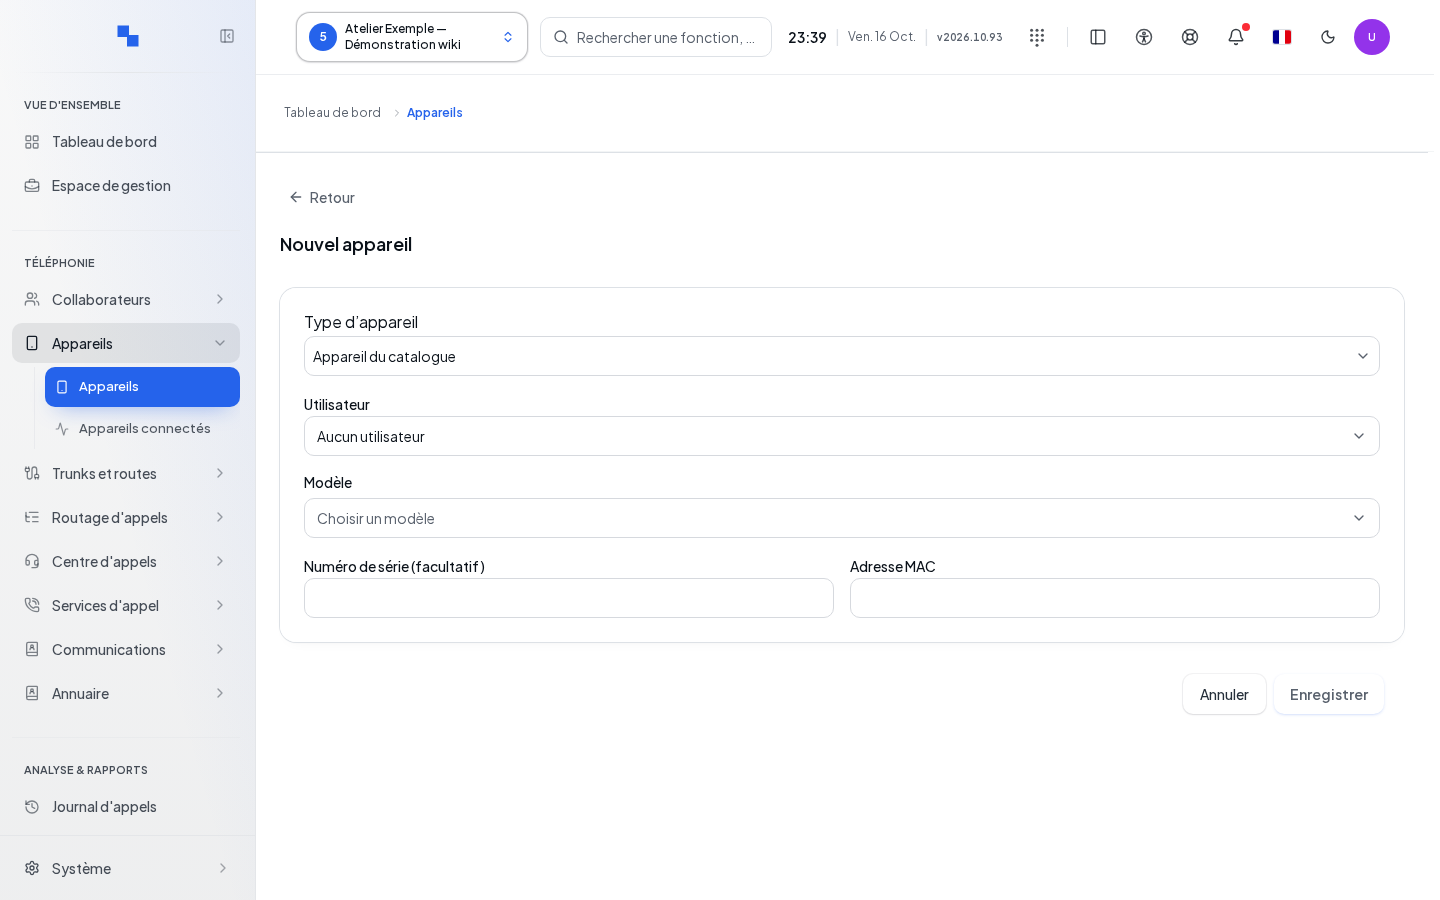
- Click Add a phone.
- Choose Device from catalog or Generic SIP device.
- Fill in the fields and the users compatible with the model's capacity.
- Click Save, then read the Handset created summary and the possible manufacturer enrollment result.
| Field | Purpose | Possible values | Example |
|---|---|---|---|
| Device type | Nature of the handset | Types offered depending on the workflow | Phone |
| Choose a model | Capabilities and configuration from the catalog | Available model; catalog required for this workflow | Model actually installed |
| MAC address | Hardware identity of the handset from the catalog | 12 hexadecimal characters after formatting | 001565ABCDEF |
| Serial number (optional) | Additional identity | Manufacturer text | Label value |
| User | Person who uses the line | Proposed user, within the model's capacity | Camille Exemple |
| Label | Name of a generic device; required in this workflow | Non-empty text | Entrance intercom |
| Brand (optional) / Model (optional) | Identifiers of a generic device | Text | Equipment reference |
An invalid MAC blocks saving. An unreadable catalog should not be worked around by choosing a random model. DECT handsets are then assigned from their base's record. Manufacturer enrollment can remain To confirm even if the handset was created: read both results.
Identity and assignments
Open Open the record. The record combines identity, assigned users, network, settings and keys depending on the model. For a simple assignment, choose the user: the SIP account is prepared automatically. The right to read users is required; without it, the current owner is retained.
On a handset or a gateway, user additions and removals only take effect when you click Save. Until then, they carry the To save label, the removed account appears struck through, and Cancel restores the original assignment.
When a handset is reassigned, it receives the change without a restart: it downloads its new configuration, usually within a few seconds. If it does not respond immediately, the PBX repeats its request for several minutes. Its temporary technical account is then removed; the fleet does not keep this offline account alongside the person's account. After saving, refresh the record and check the person's account; a genuine connection fault still needs to be diagnosed.
Save assignment and Save hardware identity process different data. The hardware identity contains MAC, manufacturer, model and serial number. The shared Save button of the general form submits the valid forms; check their results separately. Cancel asks for confirmation before discarding changes.
A multi-port gateway shows each port, including free ports. Click Assign on the desired port, choose the person, then confirm the assignment. On a base station, + Assign a user adds an account within the capacity limit. SIP credentials… opens the access for that line.
Unassigning requires confirmation because the associated SIP identifier is deleted. This does not delete the person. For a DECT handset, the Change user button on its line allows a transfer without re-pairing, on all supported DECT base stations. The procedure is detailed in DECT: handsets and clusters.
SIP credentials and web access
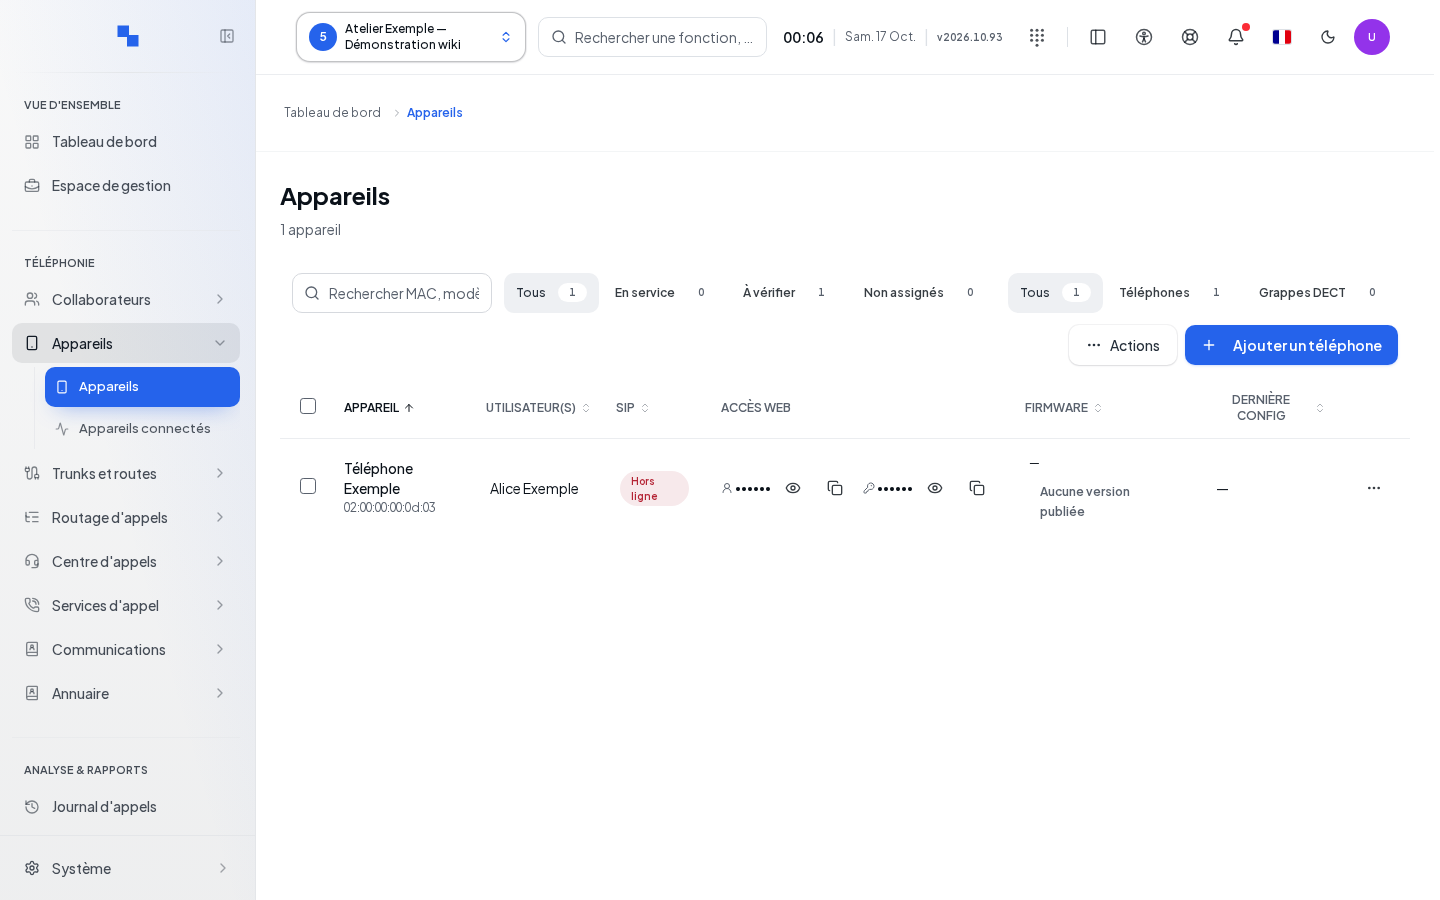
The SIP account is used by the phone to reach the switchboard; it is separate from the person's login password. The record shows the server, the transport and port, the identifier and the voice encryption mode.
Show requests the protected reading of the secret; Hide hides it and Copy copies it if the browser allows it. Renew opens a confirmation: the old secret will be replaced permanently. Then configure the new secret on the device so it can re-register.
Device web access reveals or copies the hardware administration access depending on your rights. The phone code can be regenerated with the dedicated command. Do not place any secret in a ticket or a screenshot.
Handsets whose SIP connection is entered on the device (for example Avaya 96x1 handsets in SIP, with provisional status): automatic configuration provides the server, the transport, the codecs and voicemail, but never the account. Assign the user, reveal their SIP credentials in this section, then enter them on the handset's login screen. After a SIP password change or a reassignment, reconnect the handset from its screen: the switchboard cannot remotely clear the stored login.
Transport, encryption and alarm profile
| Field | Purpose | Possible values | Example |
|---|---|---|---|
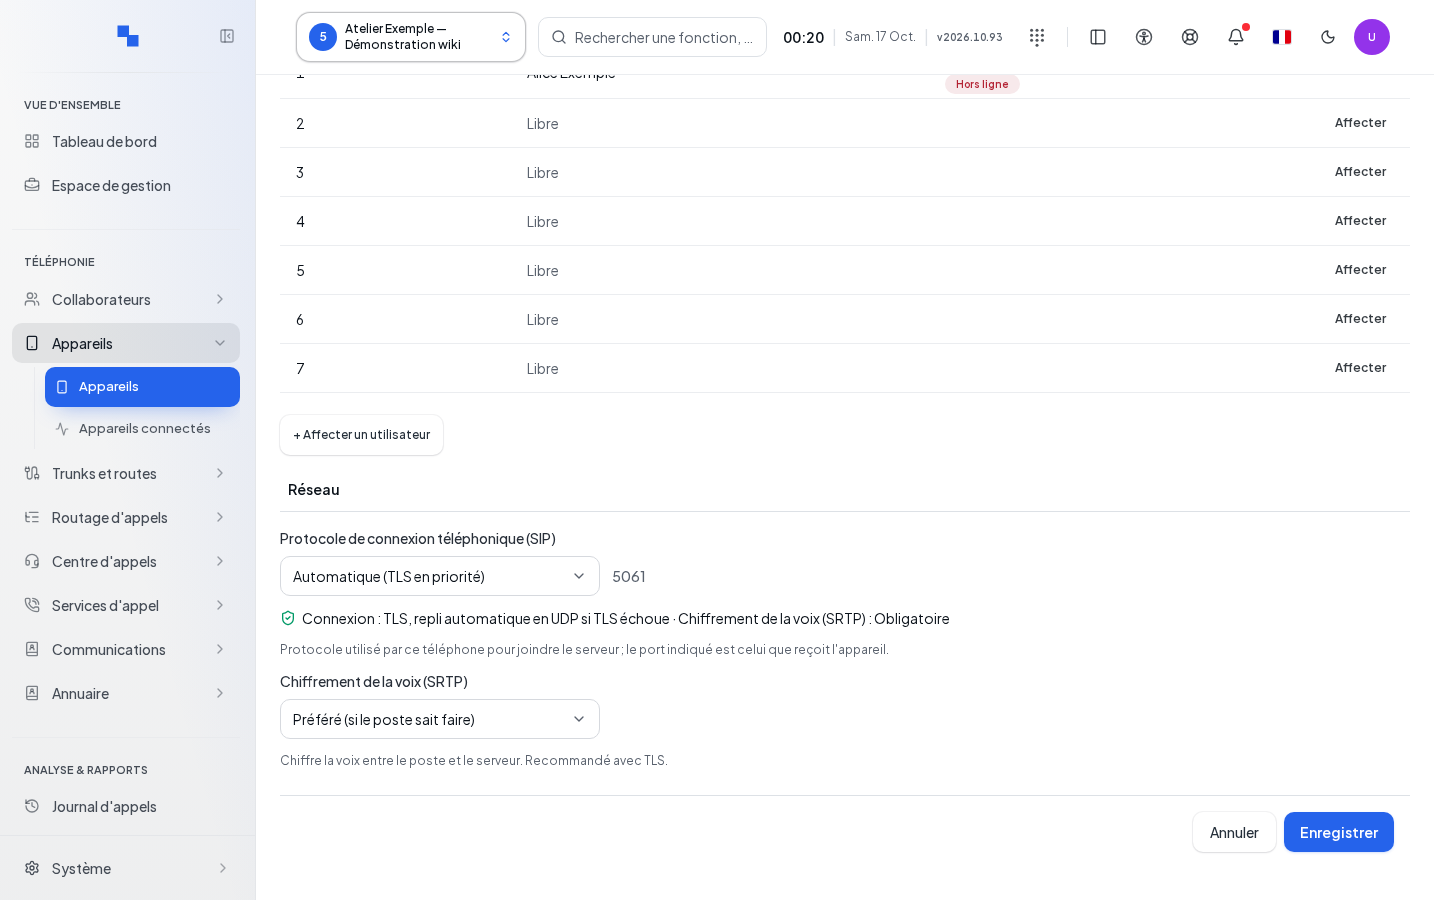
| Telephone connection protocol (SIP) | Signaling connection | Automatic or protocols offered for the model | TLS if supported |
| Port | Port actually provided to the handset | Reading of the server result | Displayed value |
| Voice encryption (SRTP) | Protection of the audio | Disabled, preferred or required depending on the model and transport | Preferred with TLS |
| Alarm / telemonitoring | Profile suited to alarm signals | Switch on a compatible device | Enabled only for this use |
| Also allow G.711 µ-law | Additional codec for the alarm profile | Switch | Depends on the hardware |
| Allowed numbers, comma-separated | Alarm destinations | List required when the profile is active | Numbers validated by the installer |
Automatic mode applies the policy resolved for the model; the screen shows the actual transport and fallbacks. Do not assume a fixed TLS port. SRTP is offered only with TLS and a compatible hardware capability. TLS alone encrypts signaling, not voice. Changing the transport adjusts the encryption choice; review it before Save.
The alarm profile uses G.711 A-law and in-band tones. Have the operation validated with the relevant hardware after saving.
Wildix Workforce5 keys
After saving BLF keys (keys supervising another handset), a reload is requested without an explicit restart command. It waits for current calls to end; if their state cannot be verified, the command is not sent. Wait until hang-up before checking the keys on the phone.
The Workforce5 has three pages of seven keys, i.e. 21 positions. Check the display, target and status after adding, modifying or removing a key. Hot application depends on the handset's firmware: check the behavior on your model, without treating a reload request as proof of application. Perform the initial load while idle.
Wildix WP410, WP480 and WP490 phones
These features use the handset's automatic configuration. After saving the settings, request Reprovision and check their application on the phone.
View dialed numbers and enable Do Not Disturb
On the WP410, WP480 and WP490, the REDIAL key opens Outgoing calls: a list provided by the switchboard, limited to the last 30 distinct numbers dialed by the primary user currently assigned to the handset. It includes internal and outbound calls available in the history, including unanswered attempts. The most recently called number appears first; select an entry to redial it.
The Log key keeps the phone's local log. A technical account or a shared handset without a logged-in user receives an empty Outgoing calls list. Variants of a number, for example with or without an international prefix, may appear separately.
A long press on the * key enables or disables Do Not Disturb. Check the status on the handset after pressing.
Declaring the WP490 modules
The WP490 supports up to three expansion modules. Each module offers 40 keys over two pages of 20. The handset keeps its 20 positions, over two pages of ten.
- Open the WP490 record from Devices, then its settings.
- In Expansion modules, choose the installed modules, in order, from first to third.
- Save the settings, then configure the user's BLF supervision keys according to the positions below.
- Request Reprovision, then check both pages of each module on the phone.
| Location | BLF positions | Page distribution |
|---|---|---|
| Handset | 1 to 20 | 1 to 10, then 11 to 20 |
| Module 1 | 21 to 60 | 21 to 40, then 41 to 60 |
| Module 2 | 61 to 100 | 61 to 80, then 81 to 100 |
| Module 3 | 101 to 140 | 101 to 120, then 121 to 140 |
On an older configuration with two or three modules, check the keys before the first reprovisioning: the former positions 41 to 60 now appear on the second page of module 1, and the former positions 61 to 80 on the first page of module 2. Have the keys adjusted if you wish to preserve their physical location. Also check the user's other handsets and shared key sets before modifying them.
Reprovision, restart and diagnose
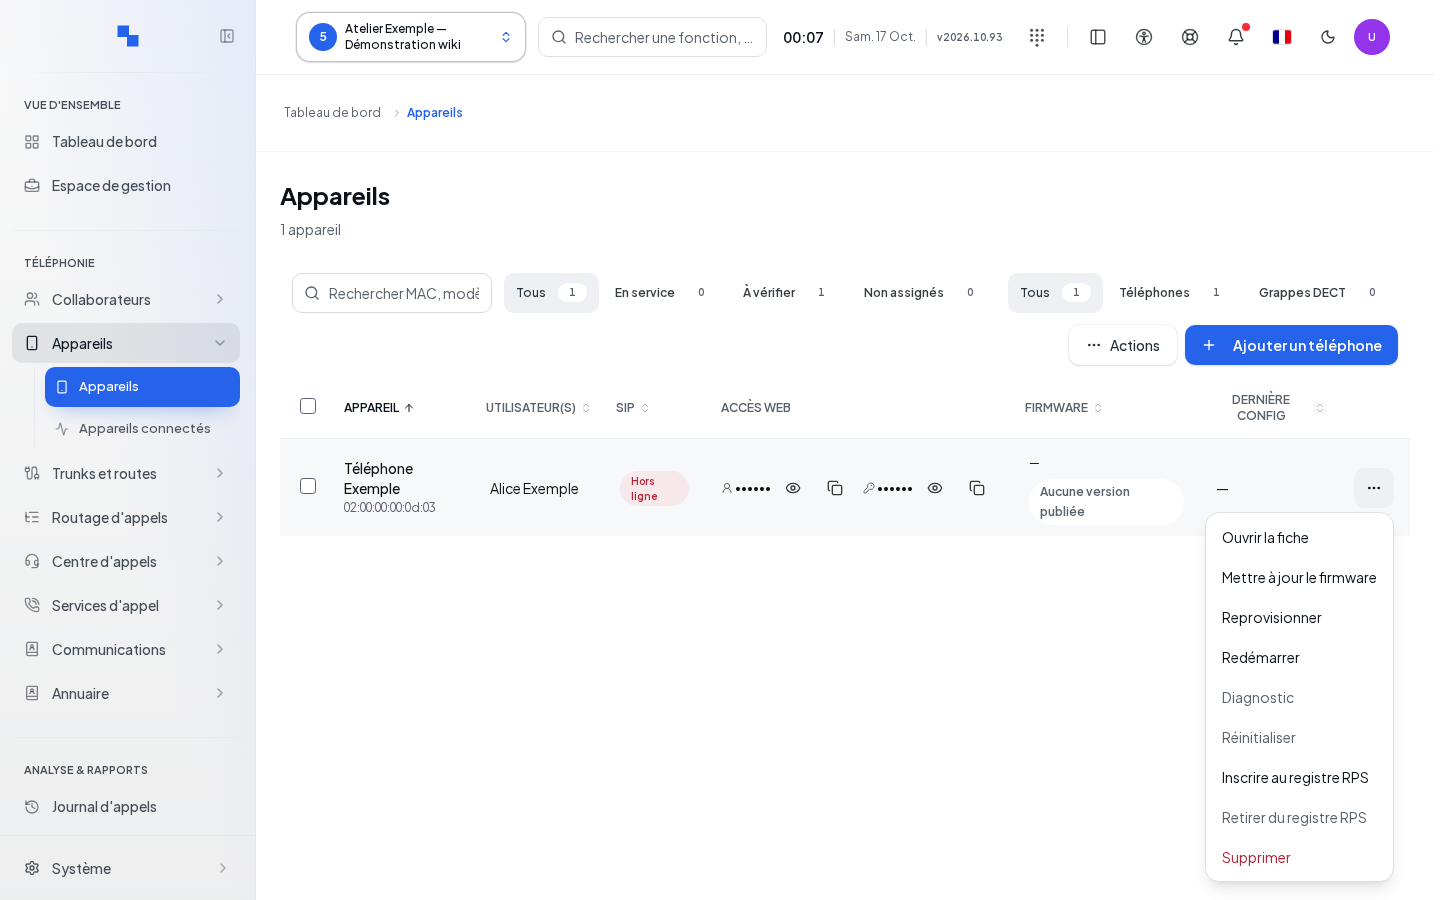
Reprovision asks the handset to reread its configuration. Restart requests a restart and may cut calls; for a DECT base station, all handsets are affected. Commands are disabled if the model does not support them. After the request, a notification under the device's name follows the command: pending, sent, then received, rejected or unreachable; an indicator is displayed in the row while sending. For several selected devices, a single notification summarizes the result, with per-device detail. An analog gateway may require a specific confirmation for cutting its calls.
After the request, follow the actual status. An accepted notification is not proof of application on the phone. Diagnostics may open remote diagnostics for compatible hardware; local diagnostics specifies that no command is sent to the phone. Refresh re-reads the status.
Manufacturer management may show not connected, temporarily unreachable, unavailable or unreadable status. Presence and version then remain unmeasured. An absent version should not be inferred from the catalog.
Updating the firmware
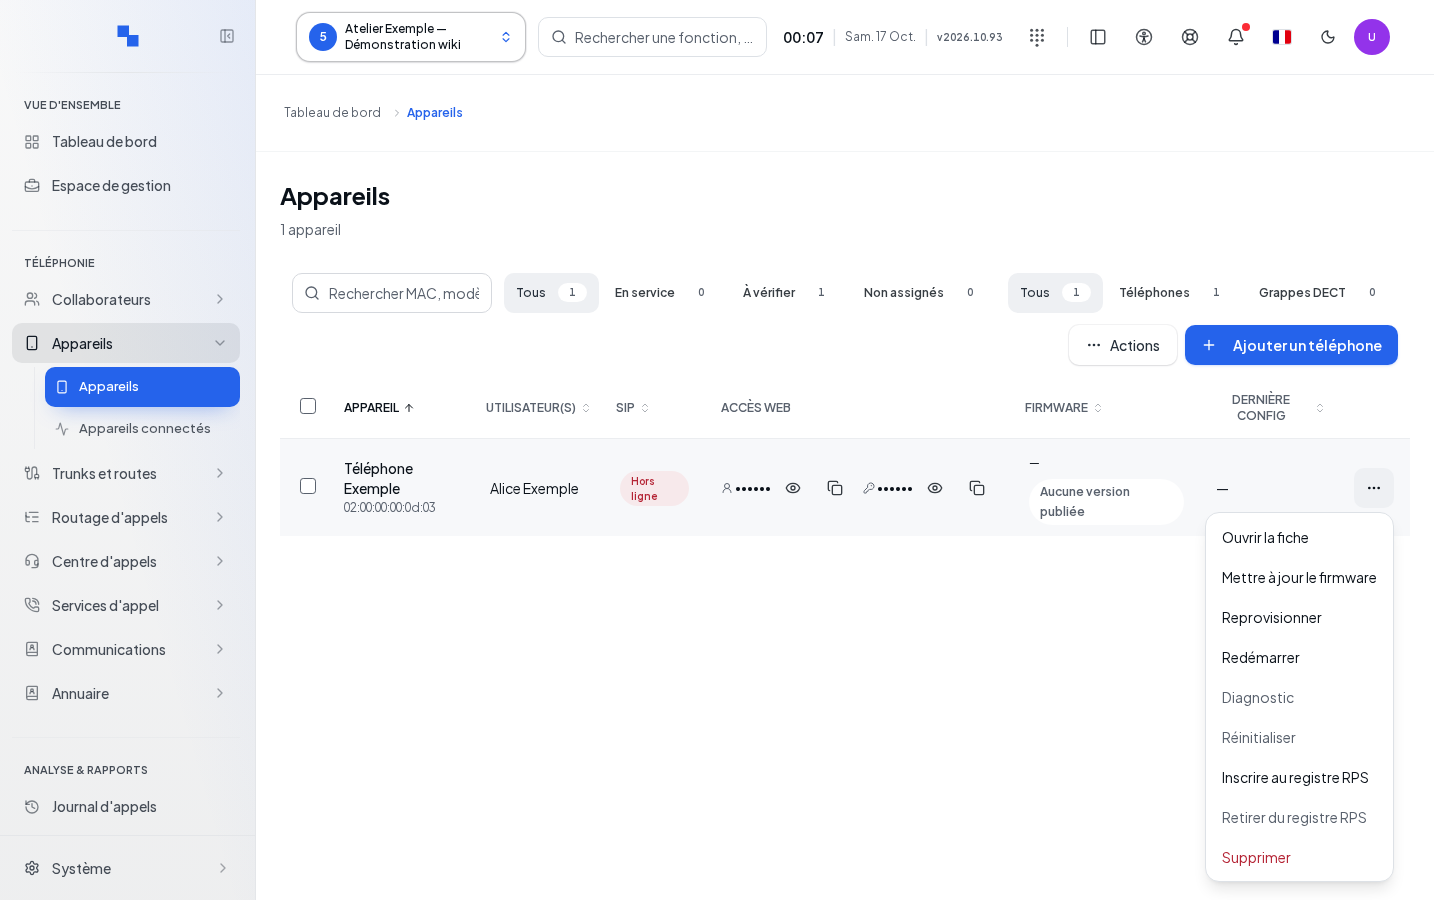
The firmware is the phone's embedded software. Open Firmware update in its record, or select several handsets then Update firmware.
- Check the eligible handsets and the target version of the signed manifest.
- Choose immediate execution or a scheduled date.
- For a schedule, specify a future date and time in the displayed Customer timezone.
- Confirm after anticipating the possible call interruption.
- Check the history then View detail per device.
A bulk request is limited to 200 handsets. Without a manifest, a published version or model support, the launch remains unavailable. The firmware requires TLS 1.2 or newer; older devices may require a manual update.
In Firmware schedules, New schedule prepares the device selection. A still-scheduled run can be Edit or Cancel after confirmation. A schedule per model exists simultaneously: "This model is already scheduled. Modify the existing schedule." A nonexistent or ambiguous time in the timezone must be replaced. Old weekly slots are removed.
Firmware catalog is a read-only view: search by model or version, refresh and view the signed files of the version, including those for base stations and handsets. The catalog does not launch an update.
DECT: handsets and clusters
Handsets belong to a person and are then assigned to base stations. Choose an existing handset or enter a 12-digit IPEI or a 10-character hexadecimal IPUI. On models that offer it, assignment without an identifier waits for the handset to register with the base station. Identify the handset then allows you to choose an observed identifier.
For W-AIR, Index on the base station starts at 0; leave blank if unknown. The index is applied at the next download. The base station sets the accepted limit.
To transfer a handset to another person without re-pairing it:
- Open its base station's record from Devices.
- Click Change user, directly on the handset's row. This action is available with device modification rights, for all supported DECT base stations.
- Check the displayed IPEI / IPUI, choose the new user, then click Save in the dialog.
- The message "Handset user changed." confirms the transfer. Then check the base station's synchronization and a call with the new account.
The transfer keeps the IPEI and radio pairing, as well as the index on a W-AIR base station. The old SIP account is removed and replaced with the new user's; the base station is reprovisioned and receives the new account at its next synchronization. The transfer is refused if the handset is assigned to several base stations: first remove its other assignments to keep only the base station from which you are transferring it.
The same action is accessible from the user record, in Devices › Choose a base station, after selecting the base station. The DECT handsets list there shows the base stations of each handset or On no base station. For a handset without a base station, Release requests confirmation and removes its stored link to the person. A still-assigned handset cannot be released.
The older method of removal then assignment remains possible: note the IPEI / IPUI, use Unassign in the row menu and confirm the removal on each affected base station. Once the handset is no longer assigned to any base station, choose the new user on the base station, enter the same identifier in New IPEI / IPUI, then click Assign user. It is not necessary to release it beforehand in the old record. This method follows the model-specific removal effects; on a W90, the hardware removal is transmitted at the next configuration download. Prefer direct transfer to preserve pairing.
On Wildix W-AIR Small Business and Sync Plus base stations, a manual pairing whose radio index is confirmed remains stored after the last handset is unassigned. The telephone accounts are deleted, but the manual radio table is kept for reassignment on the same base station and within the same organization. Without a confirmed index, automatic mode remains in use.
After reassignment, check the configuration download, the registration of the new accounts and a test call. An empty base station may become unreachable: if the remote request no longer reaches it, relaunch the configuration read from the base station. A successful download alone does not prove that radio pairing has been applied.
Removing a handset from a base station deletes its account. Until the base station has reread its configuration, it may still present the old account: these attempts are rejected without blocking the site's address, and the base station's other handsets continue to function. Request Reprovision on the base station so it forgets the removed handset.
DECT clusters groups a manager and base stations. Create a name, choose a manager base station and the available base stations, then Save. A base station must first be declared as a DECT device. When editing, promoting another manager is done from its row with Designate as manager. A manager removed from the fleet is explicitly flagged. Delete asks to confirm the dissolution.
The cluster is a management grouping. It does not configure radio coverage or pairing: radio roles are set on the devices. Do not conclude a functional radio network from the registered group alone.
Automatic configuration, logo and manufacturer registry
The Provisioning link button, at the top right of the Devices page, opens the customer's configuration download addresses. The same window is also accessible via Actions › View provisioning URL. Both access points require device read rights and a selected customer.
The Provisioning link window shows the HTTPS address, recommended, then the HTTP address, kept for older models. Each address is displayed in full over several lines. Copy places the address on the clipboard and shows "URL copied". Copy only the address intended for your device and treat it as sensitive data: it contains the customer's key.
Regenerate key, at the bottom of the window, is reserved for accounts authorized to modify devices. The current address immediately stops working: check the affected handsets before confirming. Close exits the window without changing anything.
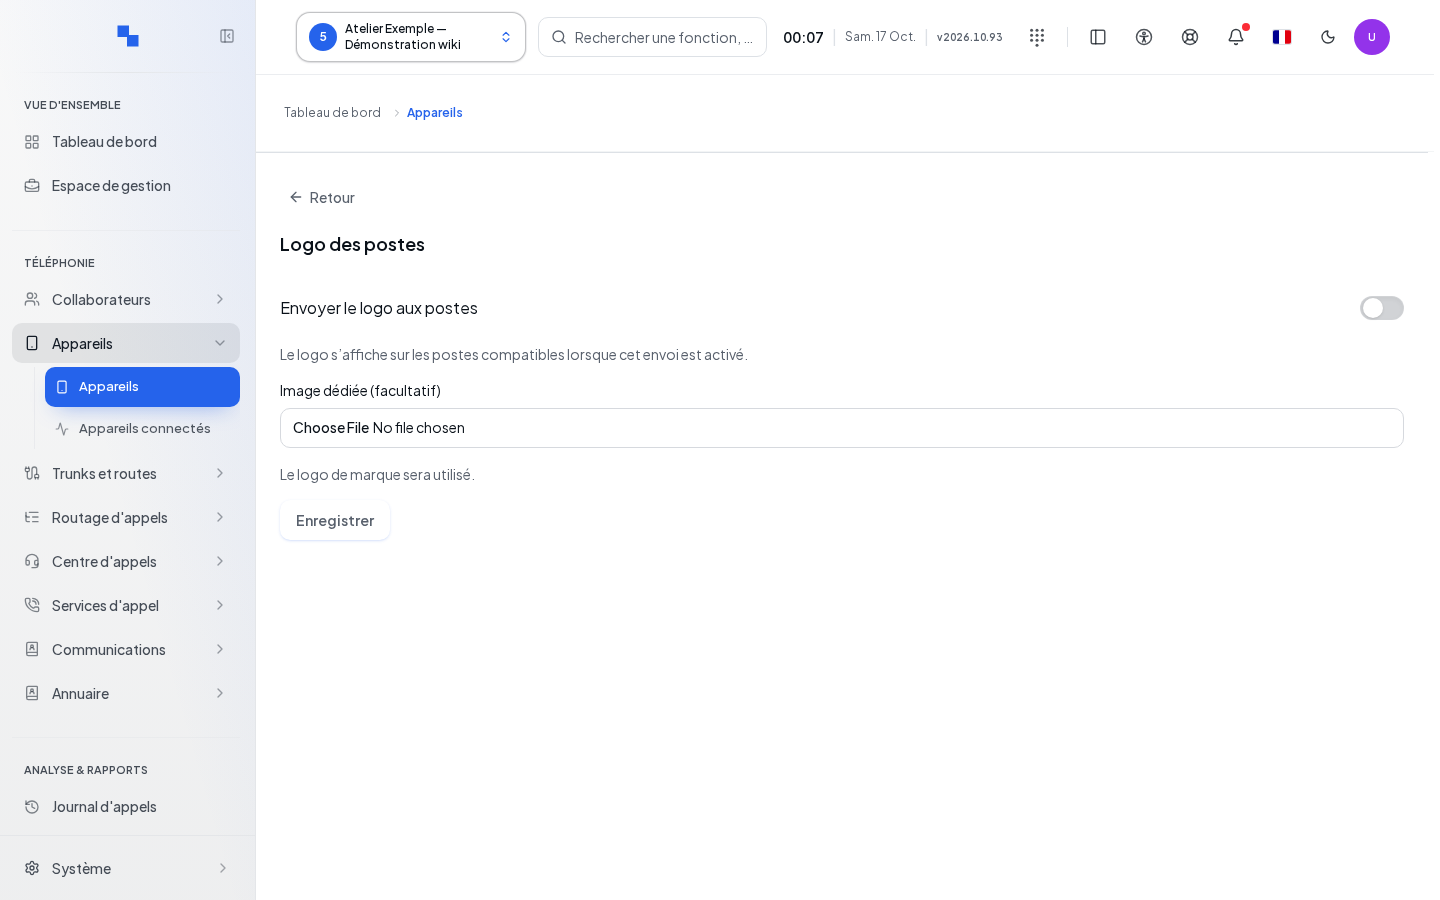
Handset logo offers Send logo to handsets, a Dedicated image (optional) and Use brand logo. PNG, JPEG or WebP formats, up to 1 MiB. Save applies the choice for compatible models.
Register with RPS registry requests confirmation then shows the enrollment result. Remove from RPS registry removes the local entry and attempts manufacturer removal. Without manufacturer confirmation, the handset may remain enrolled there. Configure the shared account from Zero-touch enrollment.
Replace, release or reset
Replace hardware… asks for the new MAC and a confirmation checkbox. Any change to the MAC unchecks this box. Check the 12 hexadecimal characters before Confirm.
On a shared handset, Disconnect hotdesk session or Release removes the occupant; the command is unavailable if it is already free. Check the displayed occupant and connection date.
Reset for a compatible remote device opens a factory reset confirmation with the MAC to be re-entered. Do not confuse it with Return to discovery: the latter detaches the user, revokes the SIP credentials and deletes the local settings on the switchboard side while keeping the HTTPS link to serve a configuration without an account.
For Return to discovery, first click Preview return to discovery, read the affected numbers, check the confirmation box, then Confirm return to discovery. Wait for an already-running reread to finish before previewing again. Downloading the erase configuration does not prove its application on the handset. End local tracking closes tracking; this does not perform a factory reset and does not stop already established calls.
Deleting a device
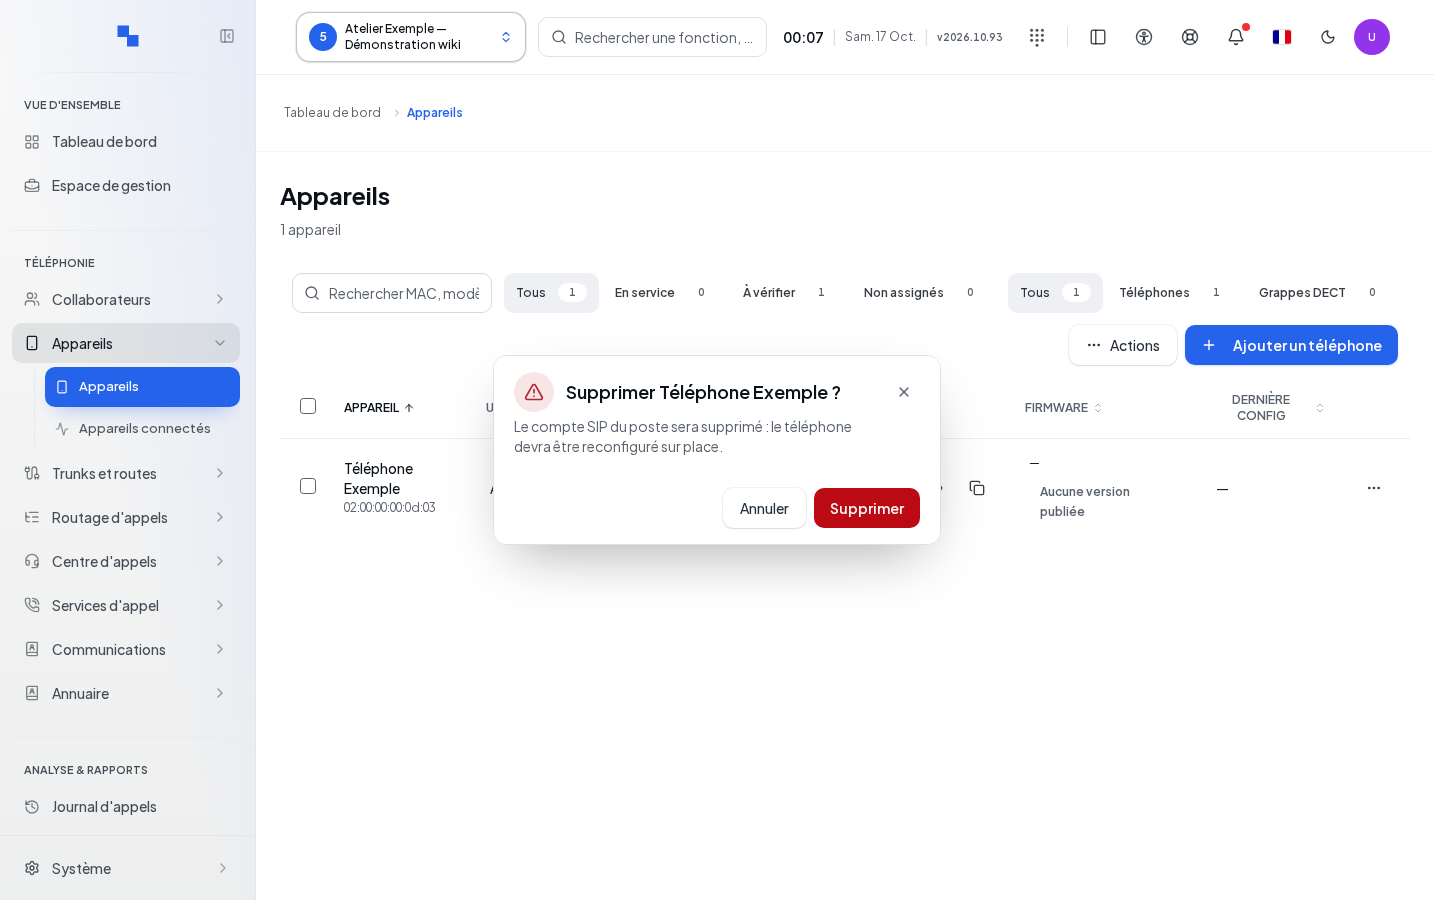
Delete opens a confirmation bearing the handset's name. Its SIP account will be removed and the phone will need to be reconfigured on site. The summary shows the accounts, notification tokens and rules removed. Cancel if you only wanted to change the user.
Mobile application connections
In the list of mobile devices for the relevant account, read the name, the iOS or Android platform, the connection date and the last use when known. Wait for loading: a read error is not an empty list.
Disconnect immediately removes the connection of the selected device, without confirmation in this component. Check the name before clicking. Commands are blocked during removal; if successful, the row disappears. This action requires write rights and does not delete the physical phone from the inventory.
Verifying the result
Check the record, the last configuration and a recent SIP registration. Make a call from the handset and to it. For a restart, an update or a reset, check the hardware itself, not just the command acceptance.
If it does not work
"Not available for this model" requires a manufacturer-specific procedure. "Signed manifest unavailable" blocks the firmware until its reading is restored. If the record reports a partial error or an unmeasured status, keep the message and the time, without web access or SIP secret.
"This handset is assigned to another user on a base station: use 'Change user' on this base station" means the entered IPEI / IPUI belongs to a still-assigned handset. Open its base station and use Change user. If the message "this handset is assigned to several base stations: remove the other assignments before changing its user" appears, remove the other assignments then start again from the retained base station.